Heat source: Difference between revisions
No edit summary |
No edit summary |
||
| Line 1: | Line 1: | ||
Add content here | |||
[[Image:heatsource.jpg|right]] | [[Image:heatsource.jpg|right]] | ||
Revision as of 23:42, 15 January 2007
Add content here
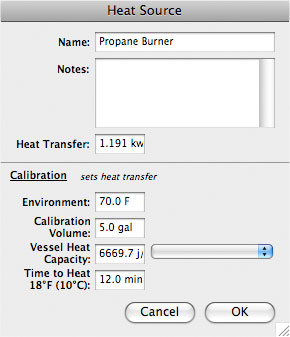
Calibration
Here are the basic steps:
1.Set your environment temperature to your ambient air temperature.
2.Set calibration volume to the volume of test water used in the calibration vessel.
3.The test vessel heat capacity can be determined from vessel calibration and if one has already been calibrated it will appear in the pop-up menu next to heat capacity.
4.To run the test heat the water in the vessel to a temperature typical of your brewing process. For example it might be ideal to use a temperature on the low end of your saccharrification rest. Record your starting time or use a stop watch.
5.Apply heat and determine how long it takes to raise the temperature 18F or 10C and enter that duration in the time to heat field.
6.The heat transfer field above will update automatically.
See also
Notes
One of the great things about Beertools Pro, is that you can use it to calibrate your burners to tell how long it will take to heat up your vessel, and calibrate the vessel to know the cool down rate and to what temperature. I did just that. I then went to my mash schedule to see what effects it would have. To my surprise it was pretty much dead on from my past brewing experiences.
